Contents
1. The Basics (a.k.a. Quick Start)
1.1 Notecard Reader
1.2 Media
1.3 Inventory Giver
2.1 Help
2.2 Preload
2.3 HUD
2.4 Screen Size
2.5 Appearance
2.5.1 Back Colour
2.5.2 Transparency
2.5.3 Buttons
2.6 Notecards
2.7 Permissions (including screen pointer)
2.8 Rez Stands
2.9 Media
2.10 Transition
2.11 Timer
2.12 Lock/Unlock
0. New to version 3.0
New features include: notecard reading, ability to replace some slides with media, slide transition animations, status report, automatic updates, integrated pointer, more versatile inventory giver, hide controls plus all the features included in previous models.
1. The Basics (a.k.a. Quick Start)
The viewer is set up and ready to use from the initial rez without the need for any change of settings. Simply right-click edit and drop slides into the “contents” tab. The slides will be advanced in alpha-numeric name order.
The default is to preload 4 slides to prevent blurring, this number can be changed (see advanced options).
The menu is activated by someone with the correct permissions touching the screen.
To lock the viewer to prevent changing slides simply “lock” from the top menu.
Do not delete any inventory items starting with a “!”, functionality will be reduced.
1.1 Notecard reader:
New to version 3.0, you can have notecards read out (whisper, say, or IM to toucher), for example, to add commentry to a stand alone tutorial. Simply place the notecard into the contents of the viewer and change it’s name to be the same as the slide you want it to accompany. The edit tab will automatically add a ” 1″ after the name, this is what the viewer will look for (alternatively save it with the ” 1″ already added, e.g. if the slide is “Slide 3” then the name of the notecard should end up as “Slide 3 1”).
1.2 Media:
Also new to version 3.0, if you wish to replace a slide in your slideshow with an image from the web, a static webpage (the current SL html on a prim capability) or a streaming video, simply take any texture that you have permission to change the name of and change the name so that it ends with the required web address. E.g. if I have a texture called “Slide 3” then changing this to “Slide 3 http://news.bbc.co.uk” will present the front page of the BBC News website instead of a slide.
The viewer will automatically detect the type of media and display accordingly.
To show media the viewer needs to have permission to change media settings of the land it is rezzed on:
Owner of viewer same as owner of land:
– Everything should work straight away.
Group owned land:
– Single versions: can be deeded to the group and it should work.
– Copy versions, or if you don’t want to deed Single viewer to the group: From the menu, spawn a “deed ball”, this ball can then be deeded to the group and paired with the viewer. The link between the viewer and the ball can be disabled from the menu if neccessary.
NOTE 1: your role in the group must allow you to deed objects to the group!
NOTE 2: To see the media slides the avatar viewing must have media streaming enabled through their preferences.
NOTE 3: Changing media properties changes them for the entire parcel. If you have another viewer/device that needs to change media settings you should subdivide the parcel.
For detailed help see online tutorial… follow link from Help/User Guide menu of the Viewer.
1.3 Inventory Giver
Touching the “i” button will give an avatar inventory items. Which items can be controlled by touching the “i” button for more than 2 seconds to bring up a menu:
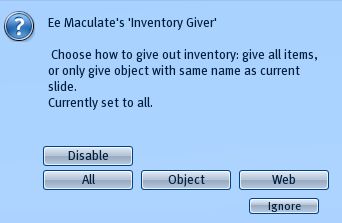
All: will give the avatar all the objects in the inventory except for the two scripts starting with a “!”.
Object: if there is an item with the same name as the current slide (notecard, landmark, object), then the avatar will be given that item. If there is no item nothing will happen.
Web: if the main display is showing media from the web, the button will open the same location in the user’s browser. Otherwise the giver looks for a notecard with the same name as the slide.. if found and the FIRST LINE is a web page it will open that web page.
Disable: Do not give out any items.
This menu can be controlled by group members if the permissions are set from the main viewer menu.
To add items to the inventory give right-click edit viewer, check the “Edit Linked Parts” box then click on the “i” button. Now drop your notecards into the contents tab.
NOTE 1: this is a different notecard to the ones in the main viewer which can be set to be read.
NOTE 2: the items to be given must have transfer permissions set!
2. Advanced Options
All these options are activated by accessing the menu/command with the name in the subtitle.
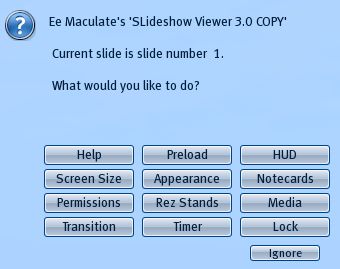
2.1 Help

Reset All: Will send a command to all scripts to reset themselves.
Chat: Displays a reminder of the commands that can be issued via chat and the channel to use. To change the channel, put a different number in the “Description” of the viewer (right-click edit, then change the “Description” in the “General” tab).
About: The version of the viewer.
User Guide: Loads online version of this user guide (this guide!).
Status: Gives the current status of the viewer settings.
Update?: Checks for a more recent version of the viewer, and downloads if available (COPY version only). This check is also made every time a viewer is rezzed.
2.2 Preload
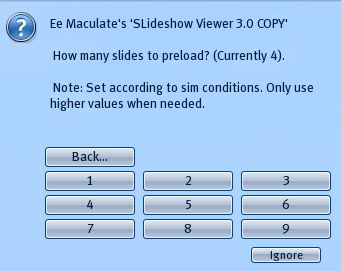
How many slides should be preloaded to prevent blurring when changing slides, choose from zero to nine. A large number should be avoided in laggy sims or areas where there are already a lot of textures to load into the viewer.
2.3 HUD
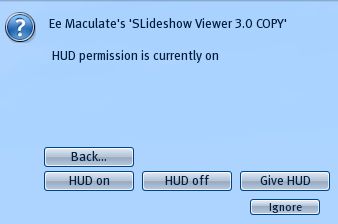
The HUD will allow you to control any viewer within a say/whisper/region distance, depending on choice. This allows, for example, for a presentation with multiple viewers or to change all viewers in a sim at the same time.
Give HUD: will deliver a HUD to the toucher. HUDs are transferable.
HUD on: turn on ability for HUD to control viewer
HUD off: turn off the ability for a HUD to control viewer
2.4 Screen Size
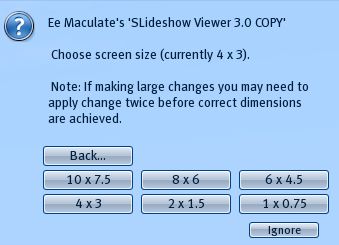
Change size of screen to one of 6 preset sizes (from a small 1×0.75 to a large 10×7.5). Alternatively you can also right-click edit and drag the white markers (but only to make screen larger than most recent size).
2.5 Appearance
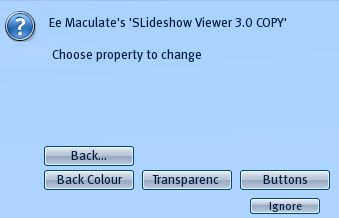
This menu option gives a number of sub-menus which alter the appearance of the viewer:
2.5.1 Back Colour: choose one of six colours for the back and border of the viewer.
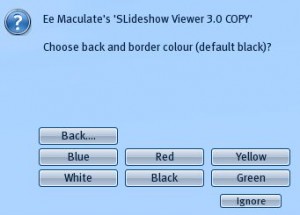
2.5.2 Transparency: Choose transparency of the back of the viewer, six choices from invisible to solid.
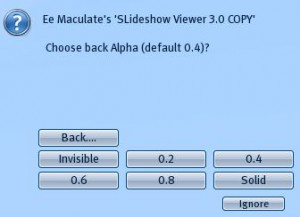
2.5.3 Buttons: Choose to hide the arrows, Start button or all buttons for a more streamlined look. When hidden viewer becomes phantom.
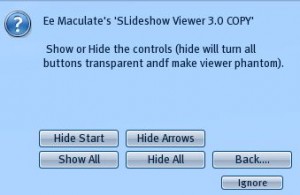
This will then give various looks to the Viewer (click to enlarge)
2.6 Notecards
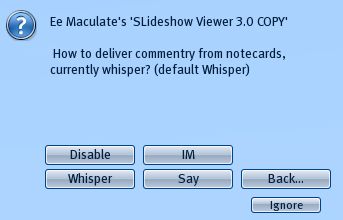
Choose for the notecard reader to whisper, say or IM the toucher when there is a notecard for a particular slide (or disable notecard reading). This action is completed whenever a slide is changed, or if a non-owner touches the screen.
2.7 Permissions

Group ON: If viewer is assigned to a group (or deeded) then “Group ON” will allow group members to advance slides even if locked and to access the menu (but not to receive updates!).
Group OFF: Turns this ability off.
Speaker: Allows group members to advance slides even when locked but does not give them access to the menu.
Pointer ON: Touching screen with permissions detailed above will put a temporary pointer on the screen where the screen has been touched. Waiting a short time, touching the pointer, or changing slide will delete the pointer from the screen. An unlocked screen with pointer on will allow anyone to activate the pointer.
NOTE: When the pointer is on touch the screen and hold button for a couple of seconds to bring up menu, or touch the border.
Pointer OFF: Turns off the pointer.
Ability to advance slides includes voice commands and HUD.
2.8 Rez Stands

Will rez stands the same colour as the viewer to add realism to the viewer. You should not link the stands to the viewer since the scripts use the link numbers of the prims.
2.9 Media
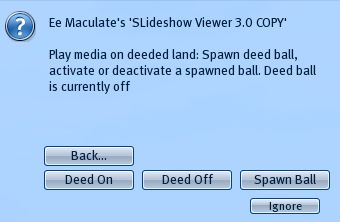
Spawn Ball: Spawn a “deed ball” to allow media to be streamed on group owned land. The first viewer to change slides within range of the deed ball will be paired with it to prevent cross-talk (the range of the deed ball is in it’s description). The deed ball is modify so you can change it’s shape and texture to blend in.
Deed On: Allow the viewer to send instructions to deed balls (this is automatically turned on when a ball is spawned).
Deed Off: Disable the viewer from sending instructions to deed balls.
NOTE: changing the media settings will do so for the whole parcel so care should be taken if there is another object relying on the media parcel settings.
2.10 Transition
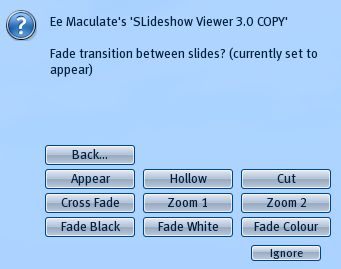
Set the slide transition, with a choice of:
Appear: Slides just appear
Hollow: Next slide appears from middle outwards of the current slide
Cut: Next slide appears as current slide gets cut like a cake
Cross Fade: self explainatory
Zoom 1 and 2: Current slide zooms out, then next slide zooms in
Fade Black: Screen goes black then next slide fades in
Fade White: Screen goes white then next slide fades in
Fade Colour: Screen goes to colour of viewer back (border) then next slide fades in
Note: some of these transitions will not work as intended if you do not have the neccessary permissions for the slides in your slideshow. This will not be a problem if you created the slides.
2.11 Timer
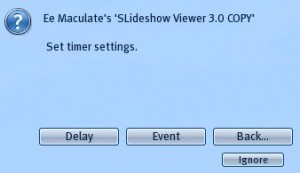
Choose the timer…
Delay: 20 seconds up to 1200 seconds (20 minutes) or turn timer off.
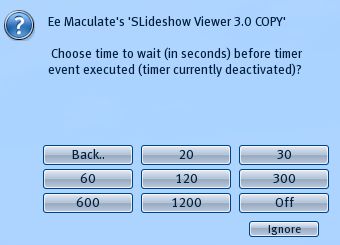
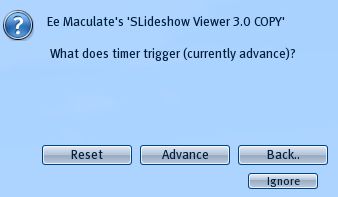
Event: Reset (go back to first slide) or Advance (go to next slide)
2.12 Lock/Unlock
Lock viewer so only owner (or owner and group members) can change slides or
Unlock viewer so anyone can advance slides.
3. FAQ / Troubleshooting
Q: I rezzed the viewer and all I have is a box that doesn’t do anything?
A: The box contains the viewer and assorted extras in it’s contents.. right click “open” and save contents to inventory.
Q: I rezzed the viewer and it’s blank.
A: Try walking around to the other side!
Q: I dragged my slides from my inventory onto the viewer but the slides won’t now change
A: The textures need to be dragged into the “Contents” tab of the edit window (right click edit). Dragging the textures onto the viewer merely changes the texture of the prim that you drag it onto, it doesn’t store it in the contents.
Q: I followed the instructions and still can’t see any media (web pages, web images or streaming video)?
A: Check you have permission to change media settings for the parcel. If it’s group owned does your role in the group allow it? On group owned land have you deeded the viewer (single version only) or spawned a “deed ball”? Does your group role allow you to deed objects to the group? You also need to make sure that your viewer has the correct settings to view media:
Edit – Preferences (or CTRL-P), then the “Audio & Video” tab and make sure the boxes about streaming media and automatically play media are checked. If automatically play media is not checked you need to press “play” on the media buttons at the bottom of the screen.
Q: It would be nice if your viewer had this or that feature?
A: I would be happy to hear it… all features that get added are due to requests or things I need myself to make my presentations better. You can also join the “Ee’s SLideshow Viewer” group for the chance to beta test forthcoming versions and get up to date news.
Q: I have a question/problem that isn’t answered here?
A: Please IM Ee Maculate and ask for help. My IMs are sent to email so capping is not a problem, and I am always happy to help with problems. Please note that I am on UK time, but do tend to log in most days.




.. is their a way to ensure that the viewer can be set to ensure textures are displayed with constrained proportions?
Only by editing the textures before uploading to have white space around, or by manually changing the aspect ratio of the screen with standard edit controls (I have done the former before with good success). You can also edit the texture properties of the screen, again using the edit window, but then you would get tiling effects.